1-04-11 Friday:
I chose the 29th model from my 81 iterations to use for this project. My final one I decided was too complex to attempt because the polygons that made it up had a figure like 600 000 000 or something rediculous like that.


I chose the 29th model from my 81 iterations to use for this project. My final one I decided was too complex to attempt because the polygons that made it up had a figure like 600 000 000 or something rediculous like that.


During the rest of the tutorial I researched some new precedent images focusing on the form, detail and constructional methods they used.
The first one I found had a focus (or emphasis) on the technique of layering to create depth and volume. From the variations they made, I could see that this technique could be pushed and give off different types of form and shape.


4-04-11 Monday:
The first one I found had a focus (or emphasis) on the technique of layering to create depth and volume. From the variations they made, I could see that this technique could be pushed and give off different types of form and shape.

Next; this laser cutting looks at defining space by removing large portions of the material and using the same patterns repeated creates an interesting interior and exterior - form.

Below, is the last one I looked at which expressed the technique of slotting parts together to hold together a form/shape.

4-04-11 Monday:
Made some sketches on my model exploring 2D profiles of the form and shape and looked at applying the technique of layering, form and slotting.


I decided to explore the technique of layering as I felt that it would be the best way to express my rendered model in a physical artefact to create a 3-D form.
7-04-11 to 10-04-11
Worked on my first sketch model for a clear idea of the visual structure and physical appearance. I needed to consider how the wire frame would actually fit in with the model as a whole because my tutor told me that the wire didn't really work so I had to decide to cut it off - this should be done later though because at the moment I needed it to support the model with it toppling over.

The second sketch model I made had rounded edges to make it more aesthetically pleasing. It resulted in a visual improvement. The edges are rounded like this so that when I twisted the 43 pieces round and you looked down on it, it created a circling motion in one direction.


My third mode was a variation of the second one. This time when you looked down at in a downwards view, it created circular motions that went in opposing directions; you would make out a 'ring' of rectangles that would 'swirl' in the left direction and the next set would swirl in the right direction.


In the fourth one I made, this one was just readjusting the measurements of the previous sketch models. When the 43 pieces were made and positioned in a twirling form, it created an uneven imaginary line which traced the twirl. After readjusting the measurements of my 43 pieces, it created a much smoother imaginary twirl.


A few days later I made my fifth sketch model. In this one I focused on developing a different visual appeal regarding the cardboard material. The previous sketch models I made were created with regards to using acrylic, the layering of the 43 pieces would create an interesting fading appearance (depending on the density of the material) but here I decided to focus instead on the 1mm cardboard we would be provided.
Between the two shapes I had, I decided to use the second one because I felt, visually it held more potential for a good aesthetic appearance. Then I cut out some shapes so that when I assembled the entire model, the added negative space from the holes would give a more complex composition.


26-04-11 Tuesday:
On youtube and researching glass rendering (acrylic) there were two things that proved to helpful. I found a website that showed me how to get to the render in glass: http://www.3dvalley.com/tutorials/creating-realistic-glass-material-in-3ds-max, and a youtube tutorial that showed me how to render my object in an acrylic looking material: http://www.youtube.com/watch?v=aqRYID2NaJ4

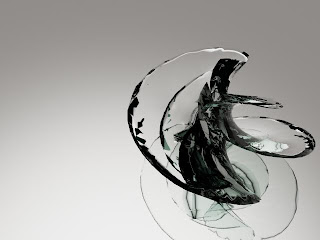
I continued to work on rendering my object and went through quite a few renders to see which one would be the best at appearing "acrylic". The following are images that I've saved during my experiments.


Notes: The first three were the results of applying the glass material. After playing a bit with that, I moved on to modifying the object so it had a smooth texture. This turned out to look better than the first ones in a sense that it didn't have that 2D-looking shadow, but a realistic 3D one. After finding the right angle of my object I turned off the smooth just to see what it looked like.

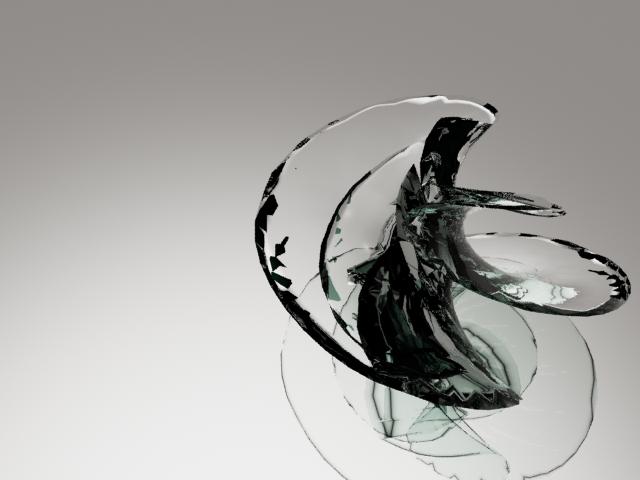
Upon looking at the renders I had done, I tried the with the one that had a smoother texture and experimented on a black background. The ground plane is still there, but I took the final shot, with it above the plane, so that the light reflecting off it can be subtly viewed. This was to also get rid of the shadow as I felt it detracted from the object itself.
When I compared it with the rest of my renders I decided, after much contemplation and analysis, that the overlaying shadows created gave a faded effect with further emphasises and compliments the form and its curves.
The final render:

02-05-11 to 08-05-11 (Monday to Sunday)
After getting our acrylic and cardboard pieces back, I completed my (two) models. I compared the two and noticed that I really like the cardboard one. I kept the masking tape on because it gave off a really nice wooden and soft feel to me; an organic nature.

The multiple layers (about 80 pieces) really worked well compared to the acrylic as it really expressed my intention of creating a 3-D form from the technique of layering.

The acrylic one was a really pretty and beautiful model. The see through material also expressed the technique of layering, but in a different sense. You can get the impression of the layering happening in the model, just not as strongly as the cardboard one. The shadows being cast compensated for the lack of strength, as you see in the image below, my model's shadow carried on the layering technique.
Between the two, I actually wanted to choose my cardboard model but it was really delicate and quite difficult to maintain the accurate layering form because the material was too thin and weak. Therefore I decided to go with my acrylic model as it was more stable and durable.
Final Model (acrylic):
